Customization Guide
Custom Packaging Guide: Printing, Finishes, Accessories, Artwork & Quality Control
Practical answers to the decisions behind every custom flexible packaging order, from choosing a printing method to preparing artwork, managing print color and testing finished pouches. This guide applies to Sorbar stand-up pouches, three side seal bags, side gusset bags, flat bottom bags, spout pouches, vacuum and retort bags, roll films and shaped pouches.
How to Choose a Printing Method: Digital vs. Gravure
When choosing a printing method, focus on the order quantity per design, the number of designs, how often the artwork changes and your color requirements. Gravure printing is better suited to stable, high-volume orders; digital printing is better suited to new-product trials, small batches and multiple designs.
| Comparison | Gravure Printing | Digital Printing |
|---|---|---|
| Best for | Established products, long-term replenishment, large custom runs | New product tests, seasonal or limited editions, small batches and multiple SKUs |
| Printing plates | Requires printing cylinders, with an upfront cylinder cost | No traditional printing cylinders, lower upfront investment |
| Print performance | Suited to fine detail, rich tonal layers and spot colors; standardized control supports batch-to-batch consistency | Sharp graphics and rich color; actual results depend on equipment, materials and process |
| Cost profile | The larger the quantity, the more the cylinder cost is spread out; unit cost is usually more competitive | Startup cost for small batches is easier to control; at large volumes, unit cost is usually higher than gravure |
| Design changes | Changes to graphics or text may require new cylinders | Flexible artwork changes, suited to multiple versions; variable data printing depends on equipment support |
| Minimum order | Confirmed by pouch type, size, material and number of designs | 1,000-piece MOQ options available; specific conditions to be confirmed |
How to Decide Quickly
- Design finalized and high quantity per design: choose gravure printing first.
- Trial sales, frequent artwork changes or several designs at once: choose digital printing first.
- High requirements for brand colors, spot colors or gradients: agree on color standards first and arrange proofing as needed. Digital printing does not necessarily mean lower print quality than gravure printing.
Free Design Template
Tell Sorbar the pouch type, size, quantity per design and number of designs you need. We can provide a free design template that marks the bleed, safe area, seals and other key positions, help you prepare your files and recommend a suitable printing method.
How to Choose a Surface Finish
The surface finish affects not only the look and feel of your packaging but also brand recognition and process cost. Choose a finish based on your brand style, product positioning and budget.

Glossy
Bright surface that enhances color vividness and makes product images and graphics stand out.
Best for: Snack, beverage and household packaging that relies on color and shelf impact

Matte
Reduces surface glare for a soft, understated look.
Best for: Minimalist coffee, tea, beauty and personal care packaging

Spot gloss / matte
Contrast between glossy and matte areas highlights the logo, product name or key graphics.
Best for: Designs that need stronger visual hierarchy and brand recognition

Hot stamping (gold / silver)
Metallic shine in selected areas highlights logos or decorative details and adds a gift feel.
Best for: Premium lines, holiday editions and gift packaging
Balancing Effect and Budget
- Simple and cost-controlled: start with an all-over glossy or all-over matte finish.
- Highlight brand elements: choose spot gloss/matte so key elements stand out.
- Premium or gift positioning: use gold or silver hot stamping on the logo or a few details, and avoid heavy decoration that hurts readability.
Finishing effects and costs are confirmed against the material, design area and order quantity. Hot stamping on pouches must be assessed for compatibility with the film and the subsequent bag-making process, and a matte finish is not the same as an anti-scratch or soft-touch effect.
Send Sorbar your artwork or reference images, and we can help evaluate a suitable finishing process and arrange samples as needed.
How to Choose Accessories and Functional Features
The right accessories and details improve how a package opens, recloses and displays. Sorbar can help you select a configuration based on your product characteristics, pouch type and use scenario.
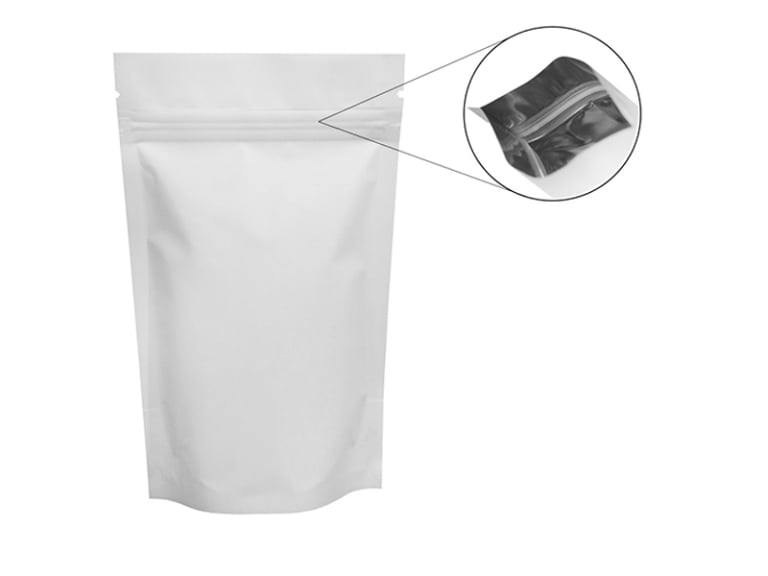
Regular zipper
Recloses after each use; suits snacks, dry goods and similar products.
Selection note: Balances practicality and cost; a zipper closure does not replace the initial heat seal.

Easy-tear zipper
Convenient first opening, with repeated reclosing afterwards.
Selection note: The opening method and structure are confirmed with samples.

Child-resistant zipper
A specific opening action reduces the risk of children opening the pack easily.
Selection note: Does not make a pack completely child-proof; if your target market has compliance requirements, the finished package must be tested accordingly.

Tear notch
Gives a starting point on the edge for tearing open a sealed pack.
Selection note: Must avoid the zipper and critical seal areas; actual tear performance depends on material and structure.

Hang hole
Supports peg-hook display on retail shelves. Round and euro (sombrero) shapes are common.
Selection note: Hole shape, size and position are confirmed against the hook specification and package weight.
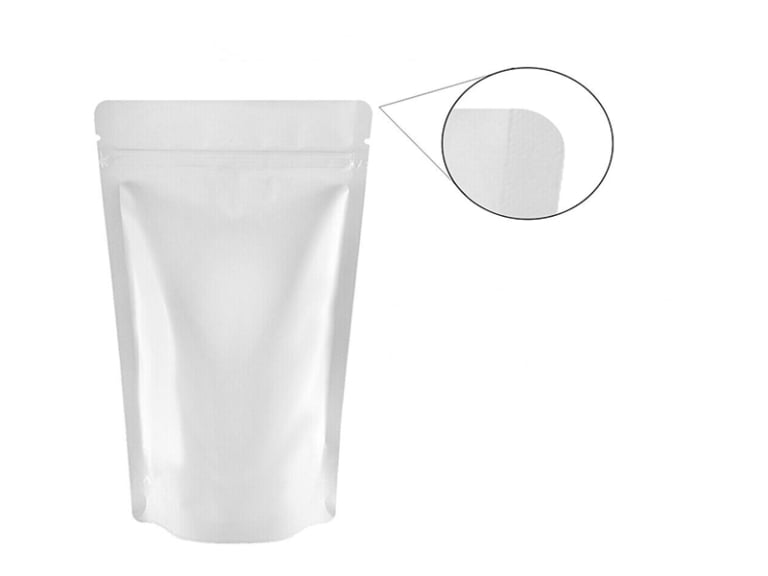
Rounded corners
Reduce scratches from sharp corners and improve handling and appearance.
Selection note: Corner radius depends on pouch type, seal width and processing conditions.

One-way degassing valve
Common in roasted coffee packaging; releases gases produced over time while limiting outside air flowing back in.
Selection note: Selected based on coffee form, fill weight, material barrier and valve performance; it does not replace a complete freshness solution.
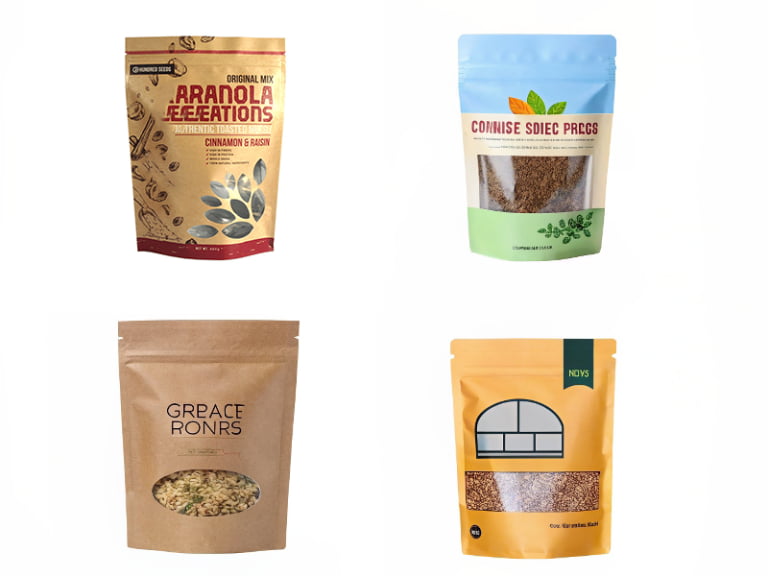
Custom window
A clear window shows the product inside without opening the pack, building purchase confidence on the shelf.
Selection note: The window area has less light and barrier protection than the rest of the pouch; its shape, size and position are confirmed against your product's shelf-life needs and the material structure.

Tin tie
Folds and secures the opening so the pack can be reclosed; common for coffee and tea.
Selection note: Usually a strip with an embedded metal wire, not necessarily aluminum; it is not an airtight seal.
Which Details Can Be Customized?
- Accessory position: confirmed by pouch type, layout, filling and sealing requirements.
- Hang hole: shape, size and position can be customized.
- Rounded corners: corner size can be adjusted to the pouch type.
- Window: shape, size and position can be customized.
- Tin tie: color, length and width can be customized; the specific solution is confirmed per project.
- Zippers and degassing valves: type, specification and position are evaluated according to product use.
Not Sure Which Accessories You Need?
Provide Sorbar with your product type, fill quantity, pouch size, sales channel and use requirements. We can evaluate accessory combinations and confirm opening, reclosing and display performance through samples.
Accessories are not suitable for every pouch type or position. The final configuration is confirmed against the material structure, production process and testing requirements.
Artwork Preparation Requirements
Well-prepared design files reduce revisions and pre-press back-and-forth, and bring the printed result closer to your expectations. We recommend getting the design template for your pouch type and size from Sorbar before laying out the artwork.
1. File Format and Image Resolution
- Provide AI or print-ready PDF files first; if you use PSD, keep the layers editable.
- Logos, text and lines should be vector artwork. PSD is a raster format, not a vector format.
- Calculate raster image resolution at the actual print size; at least 300 ppi is recommended. Vector graphics are not limited by resolution.
- Embed linked images or package them with the design file to avoid missing assets.
2. Text and Layers
- Convert text in the print file to outlines, and keep a separate editable source file for later changes.
- Do not flatten all layers. Die lines, dimension marks, white ink, spot gloss/matte and hot stamping should sit on separate, labeled layers from the printed graphics.
- If the design includes very small text or fine lines, confirm printability before printing.
3. Bleed and Safe Area
- Bleed is usually 3 mm beyond the trim line; follow the template provided by Sorbar.
- Background colors and images should extend to the bleed edge to reduce the risk of white edges after cutting.
- Logos, product information, barcodes and other important content should stay inside the safe area, away from seals, folds and accessory areas.
4. Color Mode and Spot Colors
- Use CMYK mode for color images and four-color printed content; do not use RGB files as the print reference.
- Brand colors and large solid areas in gravure printing can use spot colors. To match a color, provide the Pantone Formula Guide number with its version or suffix.
- CMYK and spot colors can be combined according to the design; CMYK is not only for images.
- Colors on screen, on paper color guides and on the actual film may differ. When color requirements are strict, confirm them with an agreed color sample or a proof.
5. Accessory Position Marking
The positions of degassing valves, tear notches, regular zippers and easy-tear zippers can be evaluated and adjusted as needed. Mark them clearly in the artwork. The final position is confirmed against the pouch type, seal width, filling method and bag-making process, so that key information is not covered and use is not affected.
6. Bottom and Side Gusset Design for Digital Printing
If you plan to use large solid background colors on the bottom or side gussets, check feasibility with Sorbar in advance. Some digital printing ink and material combinations may risk sticking during later heat processing. Whether the design needs adjusting depends on the actual printing, lamination and bag-making plan; it should not be assumed that digital printing inks are not heat resistant.
Print Color Management: From Color Standards to Production Inspection
Brand colors, large background colors and product images all shape how your packaging is recognized. Sorbar controls color deviation through standardized color matching, instrument measurement, in-line monitoring and manual sampling, improving color stability within a batch and across repeat orders.
1. Define the Color Standard
You can provide Pantone numbers or physical color samples. We evaluate how the colors will appear based on the film, base color, transparency and surface finish, and confirm the color reference before production. When using Pantone numbers, please state the guide version or suffix.
2. Collect Color Data
An X-Rite spectrophotometer collects color data and compares print samples against the approved standard. This gives quantified data for color adjustment and production inspection, and reduces deviations caused by visual judgment alone.
3. Monitor Printing In-Line
The press's automatic inspection system monitors color variation and registration in real time and flags anomalies promptly, reducing color fluctuation and misregistration that would affect the package's appearance.
4. Manual Sampling and Instrument Re-Check
During production, trained staff combine visual inspection with color-difference measurement for sampling comparisons, focusing on brand colors, key graphics and color stability within the batch.
5. Pre-Press Proof Approval
Pre-press proofing is available so you can check the design and color direction. Proofing method, cost and timing are confirmed per project. If the proof and mass production use different materials or processes, the scope in which the proof serves as a reference must also be defined.
How to Agree on Color Acceptance Criteria
Screen display, paper color guides and finished packaging will not always match exactly. Film, white ink underlay, lamination and gloss or matte finishes can all affect the final appearance. For projects with strict brand color requirements, we recommend agreeing on the following before ordering:
- Color reference: specified color numbers, a physical standard sample or a sample approved by both parties.
- Evaluation conditions: measurement method, viewing light source and final product state.
- Tolerance: if acceptance is based on color difference (ΔE), define the calculation method and acceptable range in advance.
Send Sorbar your brand color numbers, reference samples and packaging material requirements, and we will help confirm a suitable color matching and proofing plan.
Laboratory Testing of Finished Packaging
Sorbar defines finished-product test items based on the packaging structure, fill weight and use scenario, focusing on seal integrity, material strength and impact resistance to support outgoing quality inspection.
| Test | What Is Tested | Value to You |
|---|---|---|
| Leak test | Checks the pouch body and seal area for leaks under specified test conditions | Identifies potential leak risks and reduces the chance of liquid leakage, air leakage and moisture getting in |
| Tensile test | Evaluates material strength and deformation under tension | Shows how well the material withstands pulling, as a reference for filling, handling and use |
| Drop test | Tests at an agreed fill weight, drop height, orientation and number of drops, checking for bursting, opening or leakage | Simulates part of the drop impact in handling and transport to evaluate the impact resistance of the filled pack |
| Heat seal strength test | Measures the strength of the heat-sealed area under tension and observes where it fails | Evaluates how secure the seals are and identifies the risk of insufficient seal strength |
| Zipper performance test (zipper pouches) | Checks zipper opening and reclosing and the bond between zipper and pouch | Evaluates the reclosing experience and reduces the risk of zippers failing to close or separating from the pouch |
Test Standards Based on Product Use
Different pouch types, materials and fill conditions call for different tests. Specific test methods, sampling plans and acceptance criteria are agreed at the order confirmation stage. Leak testing and heat seal strength testing are different tests and cannot replace each other, and a zipper closure is not the same as an airtight seal.
If your product involves liquid filling, vacuum packing, retort processing or special transport requirements, tell Sorbar in advance so we can confirm the required tests and verification plan.
Start Your Project
Ready to plan your custom packaging?
Share your product, fill weight, target market, order quantity and preferred dimensions. We will reply with a tailored recommendation and quotation, usually within 1 business day.